Friday, December 28, 2012

Fabric curved button bracelet tutorial

Happy New Year!!! Now that Christmas has passed I can share these cute bracelets I made as gifts.  They are made with a DIY covered button kit, fabric, and a sterling silver bracelet base.  I found some cute fabric to match the personalities of my girls.  One has loved outer space forever and the other loves bright colors.  I bought 1/8 of a yard of fabric, more than I could ever use but they would  not sell me less at the store.
 
 The button kit comes with a paper template and you cut the fabric out using the template on a part of the fabric that you like.  Take the fabric put it into the button maker (a plastic cup thing that is part of the kit) put the rounded part of the button on top of the fabric. 

Remove the button shank with a pair of pliers from the button back (this can be done by pinching the shank with a pair of pliers and it will remove fairly easy, or you could cut it off with wire cutters) and then tuck the fabric into the back of the button, and place the button back on top of the fabric that has been tucked in.


I forgot to remove the button shank on this one but I removed it with a pair of needle nose pliers after I made this button.
    Use the little pushing tool (see blue object in photo) the button back will crimp to the front making a finished button.

 Here is a finished buttonNow repeat until you have enough for your project.  I coated my buttons with diamond glaze to water proof them and help keep them clean.  I then glued the buttons to the sterling silver bracelet base, the 3/4 inch buttons fit perfect.  I used E-6000 glue which is great for projects like this.

 Bright colors and outer space, two fun looks from different fabrics.

  The above photo shows the back of the finished button.  These are really cute and would be a fun addition to an outfit.  I made earring by just attaching an earring back to the button using E-6000 glue.  
Happy New Year and Enjoy Creating.

Wednesday, December 5, 2012

Softball bracelet tutorial


 I saw a really cute bracelet on Pinterest made out of a baseball, and my oldest daughter loves softball so I decide to give it a try. I bought a practice softball at Target's it was under $5.00 bucks. I really liked that it was half pink and half yellow as I knew it would make a great reversible bracelet. It was sized more to the size of a baseball which is perfect as I feel a real softball would have been to large.  This ball was made out of a vinyl of sorts and not leather.

I was able to use sissors to cut apart the stitching and carefully take the ball apart. I was left with two pieces.


These are the two pieces of the ball once it was taken apart.  Line them up back to back and then stitch using red embroidery thread. I added a jump ring and lobster claw in the middle of each side to finish.  I used a Mr. Clean scrub pad to remove as much of the writing as I could.  I think it is cute how it is reversible, and for about $6.00 worth of total supplies I think it will be a fun piece for my teen daughter.

Saturday, November 3, 2012

Recycled Blue Jeans Wrap Bracelet Tutorial

I love denim, so comfy and casual.  I recycled part of a leg of jeans and made a cute wrap bracelet and wanted to share the process.  I started by ripping a one inch strip of denim from an old pants leg.  The strip is approx. 16 inches, you may need more or less depending on your wrist size.  I frayed the edges by removing some of the threads from the sides of the denim.  Be sure and rip the length of the jean leg, the part that goes up and down. Then gather your supplies, I have scissors, needle and thread, jump rings, a 4 inch piece of 8 gauge copper, a hammer, some pliers, a metal block and one of my oval pottery links.

 Fold over approx. a 1/2 inch of the denim and stitch with a running stitch to make a loop.

 Knot the thread to finish and then add one heavy duty copper jump ring in thru the denim loop.
 Add a 2nd copper jump ring.  Repeat with the other side of the denim.
 Attach one of my pottery oval links.  This one is in stormy blue.
 Take about 4 inches of 8 gauge copper wire and form a circle with your round nose pliers.

 Flatten the link with your hammer and metal block.  Cut the ends so they are the same size and hang over the opening of the pottery link about a 1/4 of an inch.  This is a simple toggle but you could make a fancier one if you wanted to.  Attach the toggle to the other side of the denim. 
One side now has a toggle and one side the pottery link.

 Wrap the denim around your wrist, and secure with the link and toggle.  Easy Peasy, and ready for wearing.  Mine is going to be a Christmas gift, and as easy as these are you might want to make several of these. You could use ribbon, sari silk, embellish the denim strip, extend the length of the denim and wrap multiple times.....endless combinations.  Enjoy!


Sunday, October 28, 2012

Art Washes Away from the Soul the Dust of Everyday Life

Art and being creative have always been a part of me.  It is what feeds my soul, gives me peace, an escape.  I cannot imagine not creating, something....beads, beautiful baked goods, sewing.  My hands and mind moving in harmony together or sitting idle waiting for inspiration or even being given an excuse to ponder to dream or to just wonder.  I am not alone when it comes to art as there are many of you who feel the same.  I made cuff beads with the quote from Picasso; Art Washes Away from the Soul the Dust of Everyday Life.   Cindy Cima Edwards made a fantastic piece using one of my beads and was kind enough to give me credit for my bead.  Cindy's design is featured in the November 2012 Bead Trends Magazine.  There are step by step directions in the magazine.  She really made a great bracelet with warm browns and golden tones. I love how she took a metal cone finding and flattened it for the detail on the side of the cuff bead.  This would make a perfect gift for yourself or a friend. Now go create :)
Cindy Cima Edwards design with my Art Washes Cuff Bead

The November 2012 Issue of Bead Trends

In Copper Brown

In a green tea glaze too


Thursday, October 25, 2012

What’s in a name?


When I was first pregnant with my first child I can remember spending hours pouring over baby name books with my husband looking for the perfect name.  Why do you need to know this? Just to let you know it is not easy for me to come up with names.  When I first opened the shop and had to name beads it was the cuff bead, the disk bead, the rectangle bead.  Good, but what happens when you have multiple beads and you have to keep them separate and you can only have so many rectangle beads.  So I started naming the beads girls names.  A customer even asked me if my daughters name was Elli when I introduced the Elli bead, no… umm it is Elliptical so now it is the Elli bead. 
Meet the Elli bead

 The Carmine, well …umm there is a tiny town about an hour from my home and I saw something that inspired the shape and the town is named Carmine so I called the bead by the town I was in when inspiration hit.  
The Carmine Bead

Now I have a fabulous new bead I am working on I have made the test pieces but I am not ready to unveil the design and I am going to name it?  Umm again? I am still thinking.  The good news is it is only a bead and not a child I am naming now.

Sunday, September 23, 2012

A tiny peek at the process


Just because many people don't understand the process of taking mud to beads I thought I would share a quick peek at the process. The mud I use comes from Austin, Texas in 25 pound bags, and it is gray and...smells like mud.  Or I often imagine it smelling like a good pot roast as it pays for the groceries among other things. 
 
Mud new in the bag


Wednesday, September 5, 2012

A few ideas on how to use my cuff beads

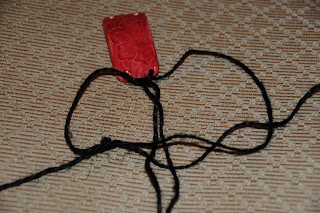
There are probably a million ways to make a bracelet with my 30x60 mm cuff beads.  Yet I still get lots of questions on how to get started so I here is a quick tutorial. One way is to use cord, ribbon or leather and a square knot to macrame a bracelet.  To macrame you will need approx. 6 ft of cord or leather.  Most people have tied a square knot at one time or another and this is very easy once you try it.  I have taught girl scouts as young as 7 years old and they learned how to in about 15 minutes.  Hopefully the photos will help. First take your cord and cut it into 4 equal pieces.     

Then string the cord thru one of the holes on the bracelet, you want one side about 6 inches long and the other side about 18 inches long.

Repeat with the other side.

Now the short ends will be the middle of your macrame and they are going to do nothing.  The longer pieces do all the work, start by taking the right hand cord over the two middle cords,

and over the left hand cord.

Bring the left hand cord under the two middle cords and up thru the loop.  Tighten gently,


and repeat starting on the right hand side.  If you don't switch sides your cord will spiral and not lay flat.

Continue repeating until the macrame is long enough to complete one half of your bracelet.


You can tie a knot at the end and attach a button on one side and a loop on the other or use a leather crimping end cord to finish.

You could also wrap wire around the end tightly to finish making a loop in your wire wrapping to attach a jump ring. 
 Leather cord can be folded over and wire wrapped to secure.  A jump ring can be attached to the leather loop for attaching to the bracelet bead.
About 6 inches of wire, bend the edge down 1/8 inch to make a hook to start


It helps to hold the loop with a pair of needle nose pliers.
A finished loop on your leather, just add a jump ring now to attach
 Another way to use my cuff beads is just attach five 10mm jump rings or larger to the end and attach leather or chain to the bead. 

In this sample the leather cord loop was attached to the cuff beads with a jump ring.

A leather cord end is a more polished look and is easily done by taking the leather and dipping it in a tiny bit of E-6000 glue and then firmly pushing the leather end cap on the leather end to secure.  Be sure and allow to dry overnight before attaching your jump ring.

The end cap glued to the leather cord

A sample made with flat leather and one made with leather round cord, both of these pieces were finished by wire wrapping the end to secure.

The left side has a loop made with the wire to attach to the lobster claw on the right
I hope this helps, with sparking some ideas on how to get started using my cuff beads.  Please look at my website for 100's of cuff beads and lots of sample photos there also.  Enjoy! Cindy