 |
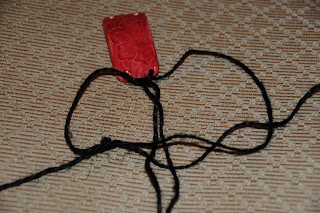
| Then string the cord thru one of the holes on the bracelet, you want one side about 6 inches long and the other side about 18 inches long. |
 |
| Repeat with the other side. |
 |
| Now the short ends will be the middle of your macrame and they are going to do nothing. The longer pieces do all the work, start by taking the right hand cord over the two middle cords, |
 |
| and over the left hand cord. |
 |
| Bring the left hand cord under the two middle cords and up thru the loop. Tighten gently, |
 |
| and repeat starting on the right hand side. If you don't switch sides your cord will spiral and not lay flat. |
 |
| Continue repeating until the macrame is long enough to complete one half of your bracelet. |
 |
| You can tie a knot at the end and attach a button on one side and a loop on the other or use a leather crimping end cord to finish. |
 |
| You could also wrap wire around the end tightly to finish making a loop in your wire wrapping to attach a jump ring. |

| |
 |
| It helps to hold the loop with a pair of needle nose pliers. |
 |
| A finished loop on your leather, just add a jump ring now to attach |
 |
| In this sample the leather cord loop was attached to the cuff beads with a jump ring. |
 |
| The end cap glued to the leather cord |
 |
| A sample made with flat leather and one made with leather round cord, both of these pieces were finished by wire wrapping the end to secure. |
 |
| The left side has a loop made with the wire to attach to the lobster claw on the right |


My first thought is that I'll have all those strings tangled in a knot, but perhaps it becomes like braiding after a while, and you can just do it with your eyes closed!
ReplyDeleteThanks for the tutorial!
Yes, It is just like braiding...you just get in the rhythm and it is done. Try it you might like it. It also helps to use a clip board (from an office store the kind that holds paper with a clip at the top and a board on the bottom) that way everything stays in line easier.
ReplyDeleteThanks, I will give it a try!
ReplyDelete