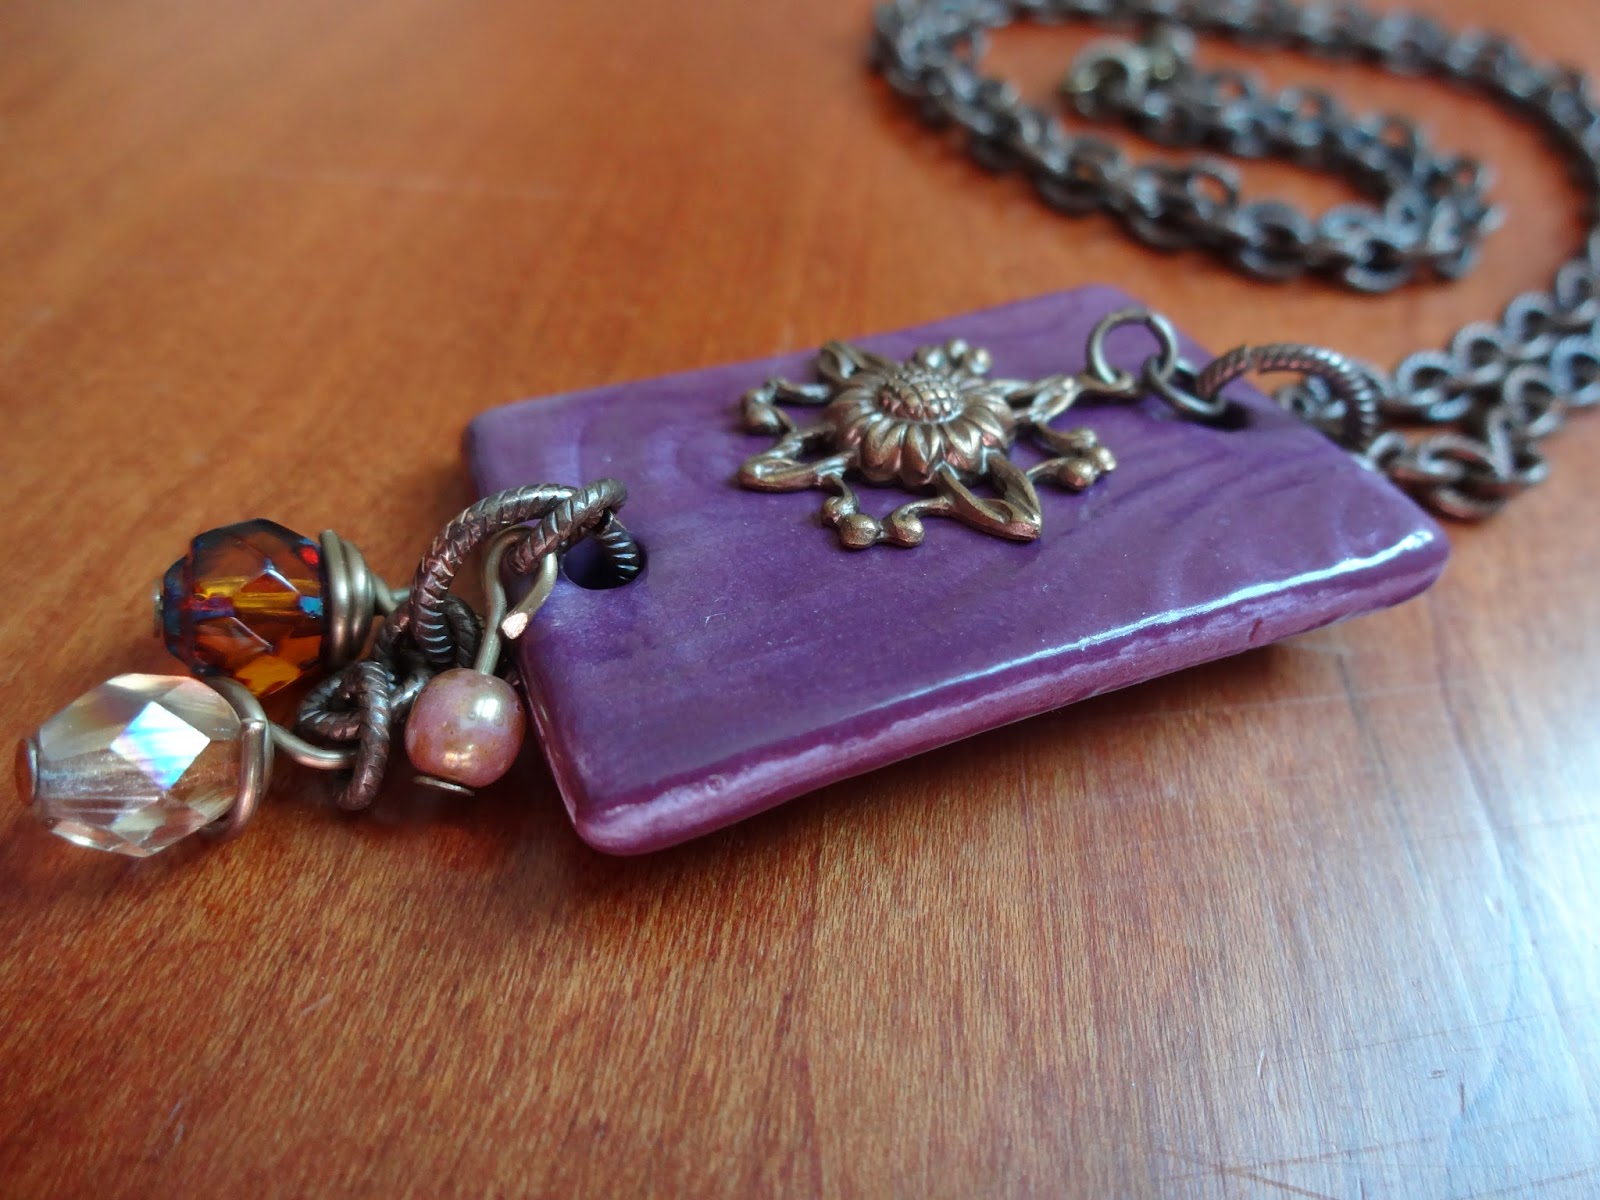
Showing posts with label made in Texas. Show all posts

Saturday, September 1, 2018

Summer time is for Succulent Pots

I have really enjoyed making the succulent pots and its a great way for me to help fill the kiln as it takes 100's of beads to fill the kiln.  Sometimes having a few larger items to take up the space in the kiln is nice.  My pots are organic and free shaped and I often make them and gently drop them while still wet to let gravity aid in the formation, much like the landscape is formed naturally.  Send me photos of how you use your little succulent pots and I will post them to share.
I made this one for my mom for Mother's day, it is the color worldly mix and I have similar in the shop

This one is a rustic truck red and brown, I love the way the red flowed down the pot

Cobalt and copper brown rich tones that would look great in your home

This one is a nice teal green 

This color is slate and it always looks as if the piece was buried for a 100 years before finding it again

Sunday, November 5, 2017

New Colors

I have several new glazes, fun colors with a hint of sparkle.  The colors have a lot of dimension and texture even though the glaze is smooth.  Rich tones of green, blue and a tomato red.  I have a few more but I haven't had time to fire those pieces yet.  Listed in my shop with lots more options.

This shade sure looks great with turquoise


Also two new this purple shades.  The first is more of a cranberry and the second a true deep purple.


Please send me photos of your finished products using my beads and I will post them on a upcoming blog.

Monday, September 26, 2016

The Tale of Two Texas Gals

Another Texas gal, Kerry Best with Kerry Best Designs is from Allen Texas about three hours North of me.  She has been making some great wrapped designs with my cuff beads.  Kerry commented on using my Captured Moments Pottery Beads " I'm also in Texas and love making all kinds of jewelry, but beaded wraps are probably my favorite. Your cuff beads really add a unique look, and everyone loves the quotes. The last set was so popular, I sold them before they were finished."   Well you can see why they sold so quickly as they really are cute.  Kerry has other fun wraps in her shop at Etsy.  If you have photos of designs you have made using my pieces send them to me so I can showcase them on the blog.  If you have sent photos in the past and I haven't used them please send them again.  Enjoy!

This one is in Stormy Blue


Malachite Green
Copper Brown


Sunday, August 23, 2015

New Designs

This is the last day of Summer in Texas as school officially starts tomorrow.  It is 100 plus degrees outside most days and the ground is parched from the heat.  Road trips to visit family and friends and to explore the great state of Texas are done for this Summer.  With a new school year comes the promise of new discoveries and mixed emotions.  The opportunity for my girls to discover new knowledge and friends, but more rigid schedules and no sleeping in.  Fall will bring cooler weather and a welcome relief from the Texas heat.  School sports will begin and be added to my busy schedule.  All in the great circle of life that I live as a mom and artist.   

Sometime I have a million ideas, but not enough hours to explore them.  Yet, I am thankful for the moments I spend in my roles and I am thankful when an idea becomes tangible.  I am always excited to open the kiln, to see what was earth is now art.  I love the art of pottery for its inconsistencies and variety.  That a glaze is never the same, and that it has a free nature about it.  It amazes me that mud can be manipulated and made so beautiful.  Each bead I make is made entirely by hand, from forming and cutting the mud or clay.  To texturing and shaping it, with molds that were once mud and now they become press molds to recreate a design that has been etched into them.  The kiln is the only item that requires electricity, it takes me weeks to be able to produce enough to fire the kiln and it takes approx. 9 hours to fire and more that 24 additional hours to cool before I can lift the door and see the fruit of my labor. From the day I pull the mud out and start a bead until the day it comes from the last fire of the kiln is a 6-8 week process.  So in the spirit of new discoveries, here are some of my latest designs that began at the start of summer and are just now ready to share at the end.

 These beautiful beads have a large dimensional; flower in vibrant orange and yellow.  I made this set for myself using some agate beads and cord for the pendant and one of my distressed leather cuffs and cord to assemble the cuff.  It is a beautiful set to wear.  I have these beads available in my shop.


 This Elli bead features a horse head with a leather texture background.  It is curved and would be a great start to a western bracelet.  A different type of horse below, a seahorse.  This one is flat for a pendant but I made some curved for cuffs, this is a larger version of my ELLI bead.


This is a set I made for a friend using the last of a glaze that I had (This color is no longer available) 
I mixed my beads with Azurite stones and it is a great combo of blues and greens.  I made 2 pair of earring to give her some variety. 


The above great design was made with my art washes bead by Christina Hosford.  She made the bracelet as a gift for her favorite artist friend Brandi Dayton She made her a double strand bracelet with Labradorite, Phantom Quartz, Garnets, Kiwi Jasper, Mookaite and Turquoise.   She states that "It was a really fun piece to make, and I really enjoyed working with your pottery piece."

I hope you enjoy the new designs, I will have them in my shop soon.  If you don't see them in the shop send me a message and I will send you the link.  Thanks, Cindy


Saturday, March 28, 2015

New designer spotlight


Laura Rendall states that creating art with her hands has always been her passion. She is new to Etsy and has recently opened Korále Art because she wanted to create unique jewelry pieces that incorporated different forms of art. The beads she uses come from places such as Austria and the Czech Republic and have a historic past.  The pendants and focal pieces she uses are created by artists here in the USA who use everything from wood to porcelain to clay. See below designs using Captured Moments pottery beads .  Also check out and follow my Pinterest Board with lots of designs using Captured Moments pottery beads.
Antique white with leaf design

In Blueberry

Rosemary bead in Seagreen

Washer bead in the color Worldly Mix

Monday, March 9, 2015

Sharing Cute Leather Cuffs

Anyone who has read my blog before knows that I refer to my beads as "the kids" well some of my kids have headed West.  These cute cuffs were made with my pottery focal beads by Emily Laurita, her shop is Rocking 27 Boutique.  Emily is a small town girl born and raised in Colorado, her fiancé and her work on a ranch based in New Mexico. She love to create jewelry and home decor when she has any free time.  I hope you enjoy seeing these cute cuffs.  I have lots of beads in my shop if your inspired to make a cuff yourself, or head over to Emily's shop for one ready to wear.


Thursday, August 8, 2013

Leather Cuff Using Recycled Upcycled Leather Tutorial

Free Tutorial, this is so easy you can make it today and wear it today. :)

Supplies: 

1. Find an old belt that doesn't fit anymore or one from a thrift store.  Cut off approx. 7 1/4 inches of the leather (for a large cuff-less if your wrist is smaller).  Most belts will make 3-6 cuff bracelets or more depending on the size of the belt and the cuffs you make.
2.  Choose a great pottery focal bead.  I have several 100 to choose from I used the 30x60 mm cuff bead.
3.  Gather your leather punch, an ice pick would work also (just be careful).
 4.  Micro screws are used to cold connect (Cold connection refers to the process of joining together two pieces of metal without the use of heat) the pieces. I use a screwdriver to attach the screws like one you would use to repair eyeglasses.  The ends of the micro screws can easily be cut off if too long using wire cutters, and filed if needed with a household file to debur the edges.  I will often put a tiny drop of glue to make sure the screws do not loosen as the cuff is worn.
Stainless steel micro screws and nuts
 5. A pair of decorative ends in sterling silver plate.
These are reversable
Directions:

1. Cut the leather to size about 7 inches.
2. Hold the decorative end to the top end of the leather and mark where the screws will go.  Punch with leather punch.
3.  Attach decorative end using the micro screws and nuts.  Trim excess if needed with wire cutters.

One side attached to the decorative end
The back of the cuff

4.  Repeat with other side and attach a jump ring to one side and a lobster claw to the other side.
5.  Choose a cuff bead and mark the center placement on the leather using a pencil to indicate hole placement.  Make holes with leather punch and attach with micro screws and nuts thru the top of the bead, down into the leather, and finishing in the back with the nut.  Trim screw if necessary with wire cutters.  The screw should hold the bead to the leather but do not over tighten as you could break the bead. 

The back of the cuff before the screws were trimmed with wire cutters
 The finished bracelet, so cute and so easy.  How many will you make?

Leather cuff with pottery cowgirl bead
 I hope you enjoy creating with this free leather cuff and pottery bead tutorial.

Tuesday, July 23, 2013

Tutorial for Leather Cuff Bracelet

Honey Brown Mixed Media Cuff


This bracelet was accepted to be in the October Issue of Bead Trends.  Unfortunately, they are no longer publishing the magazine, so they sent it back to me.  Here is the tutorial I hope you enjoy making one similar.

The Inspiration:

Inspired by the love of vintage, this mixed media cuff features 2 vintage metal findings and a pottery bead in a metallic golden brown.  The pottery bead used on this cuff was handmade by me and is named after the most beautiful woman I know, my mom Zephyr.
The leather cuff is made using a cold connection process with micro screws.  A love of antiques and all things old becomes a show piece cuff bracelet.


Supplies:
Copper Brown Pottery Zephyr Bead from www.CapturedMoments.ETSY.com
2 Antique Victorian style brass stampings https://www.etsy.com/shop/2VintageGypsies
Leather 4x9 inch piece from Michaels
DIY Metal Jean Button Sewing Dept. of Michaels
6 brass daisy beads
6 micro screws and nuts www.CapturedMoments.ETSY.com
Leather Punch
Scissors
Hammer
Wood block
Small screw driver

Instructions:
1. Cut leather to 1 3/4x 9 inches, or smaller to fit your wrist.  Add jean button by punching a small starter hole at one end of the leather approx ½ inch from the end and centered.  Put the top ½ of the button through the top of the leather in to the punched hole and put the bottom ½ of the button on the bottom side of the leather aligning with the button top.  Place top side down on a block of wood and hammer it once or twice to secure.  Punch a small hole in the center of the other end of the leather ½ each from the end, and another at 1 inch from the end.  Cut down the center of the two holes to make a button hole for the jean button.
2. Determine the mid point of the leather, place the pottery Zephyr bead at the mid point and mark on the leather where the holes are.  Make a tiny hole with a leather punch, and then add a daisy bead and a micro screw thru the bead and secure on the back with a micro nut.  You could add E-6000 before attaching the screws for a more secure fit.  Repeat on the other side.
3. Attach a antique brass finding on either side of the pottery bead using the micro screw and daisy bead, securing on the back with a micro nut. The back of the micro screw can be sanded with a file if it is too long.

Tuesday, March 26, 2013

New Bead Designs


I just received my April issue of Bead Trends (I know you love the magazine as much as I do...but don't worry if your is not in the mail box yet, mine came early!!! WHY YOU ASK?).  I have two designs featured in the April 2013 issue.  The first design is a necklace with matching earrings in my new half circle sweet daisy beads.  It was made with copper chain and Swarovski crystal bicone beads in topaz.
? 
Supplies:
Beads: 5 half circle golden brown pottery beads with daisy’s www.CapturedMoments.ETSY.com
qty 4 8mm Swarovski crystal bicone beads in topaz artbeads.com
Chain: 22 inches of copper chain www.CapturedMoments.ETSY.com
Jump rings: qty. 14 9mm copper jump rings www.CapturedMoments.ETSY.com
Lobster claw clasp: one 15mm www.CapturedMoments.ETSY.com
Head pins: qty. 4 2 inch copper head pins artbeads.com
Copper daisy beads: qty. 4 5mm copper daisy spacer beads. Artbeads.com
Ear wires: qty. 2 copper ear wires www.artbeads.com
 
Step by step instructions:
 

Earrings


1. Take one head pin and place one copper daisy spacer bead, then one topaz bicone bead; make a simple loop.  To make a simple loop use your chain nose pliers and bend the head pin to make a 90 degree angle above your bicone bead.  Then with the wire end facing towards you grip the end with the your round nose pliers and wrap the wire away from you by turning the round nose pliers to make a nice loop. Then wrap the wire around the bottom of the loop to secure.  Cut off any excess wire.  Repeat to make a total of 4 simple loops.  2 will be used with the earring and 2 with the necklace.


2. Cut 2 pieces of 3 inch copper chain.


3. Attach one piece of the 3 inch copper chain to one of the pottery beads with a jump ring, attach the other end of the chain to the other side of the bead.


4. Carefully open the bottom loop of the ear wire and attach the copper chain that is now attached to the pottery bead into the center point of the chain.  Add the topaz bead loop to the opening also.  Close the bottom loop of the ear wire and repeat to finish 2nd earring.


Necklace:


1. Cut two pieces of 7 ½ inches of copper chain.  Take 4 jump rings and attach a jump ring to each end of each piece of chain.


2. Attach one of the pottery daisy beads to one of the jump rings on the copper chain. 


3.  Attach the 2nd pottery daisy bead to the first with a jump ring, add another jump ring and then attach the last pottery daisy bead to the other beads.  You will have a total of 3 pottery beads and each will be spaced with 3 jump rings. I used a oval jump ring in the middle of the three jump rings for interest.


4.  Attach the remaining chain to the pottery daisy bead with a jump ring. 


5.  Add a topaz bicone bead to the center jump ring to the right and left of the center pottery bead.  See finished piece.


6. Add a lobster claw to one of the chain ends.


7. Enjoy!

I also have a bangle in the April 2013 Bead Trends Magazine (see page 46-47) it is made using one of my pottery heart beads.A simple design using copper wire from the electrical supply store.


Supplies:


Wire: 16 inches of 8 gauge copper wire, from the hardware store, electrical dept.
And 16 inches of 12 gauge wire
Bead: Pottery heart bead in Malachite Green from CapturedMoments.etsy.com

Step by Step Instructions:

1. Cut a 16 inch piece of 8 gauge copper wire and make a larger loop at one end this will be part of the clasp.

2. Thread pottery bead unto the 8 gauge wire.

3. Bend the wire around a bracelet mandrel, or an oval shaped object. I use the handle of an axe from the garage.  You want to then check the sizing and see if it would fit your wrist comfortably.  Cut off any excess wire leaving ¾ inch extra to make a simple hook for your bangle.  Carefully flatten the wire on the bangle using a bench block and hammer, make sure your bead is in place where you want it and flatten the wire around the bead being careful not to hit the bead.  It is helpful if the bead hole is large enough to slide the bead out of the way while shaping the copper wire.  Flatten the copper wire of the bangle to add detail. 

4. Shape a simple hook to the remaining end.

5. Take a 2 inch piece of 8 gauge wire and fashion an “S” curve or other shape to accent your bangle. Or any design that you like.

6. Flatten the copper “S” shape using a hammer and a metal bench block.

7. Attach the “S” shape to the bangle near the bead with the thinner wire.  Wrap with wire to secure and wrap on each side of the heart bead to secure the pottery bead from sliding on your bangle.

8. Wrap the loop closure with wire to secure.

9. If you have a torch or a gas oven you can carefully hold your finished piece to the heat for a few seconds to torch fire the copper, changing its colors.  If you see colors you like on the copper, stop the torch firing as you cannot bring your piece back to those colors.  The pottery bead will not be affected by a quick flicker of heat. 

I hope you enjoy the tutorials. 


Sunday, February 10, 2013

New Bead Designs

I have been working on getting out new designs for 2013, and the first batches are coming out of the kiln and the kiln is filled as I type with a load that is nearing 1945 degrees Fahrenheit.  So I wanted to introduce you to some of the new designs.  And with anything new comes the need for a name ummm....see older post for more on this dilemma. 
Introducing the LaDonna Bead, this bead has a tag or industrial feel.  It was inspired by a friend of mine who showed me this great found object she and her nephew rescued from the parking lot of a truck stop.  It is large and light weight and looks like it was made of metal.  LaDonna has a great shop filled with metal work and pieces made with found objects.  
The LaDonna in Stormy Blue
 On the sample piece I attached beads and a key using some recycled oval jump rings.
In Black Ice

The new Zephyr bead is curvy bead that is flat for pendants and earrings and I will have it in lots of colors and textures. The sample below is in Autumn and has a lace texture.

 The Edith bead is a square bead and comes in a large curved version for cuffs and a smaller flat version for earrings and pendants.  The smaller ones would be great linked together.  The sample is shown in copper brown in the whimsy pattern.
 This lovely decorative bead is the Rosemary bead, it is nicely curved for bracelets, shown below in Turquoise blue with a floral pattern.

A new little fish, in a soft tea green with brown letters, I will be making fish in lots of colors, a great little Christian bead it will be fun to design with.
 I have more designs still drying and hope to have them done soon, luckily there is a roast in the oven and time for me to post them and get them ready for your designs.  Enjoy the new designs, stop back to see all the new colors soon. 

Sunday, January 13, 2013

What a great honor

What fun to be in a national magazine.  I am honored to be in the February 2013 Bead Trends Magazine.  Last year I submitted a interchangeable bracelet design using 3 of my beads and 3 cords or chains to have up to 18 different variety's of a bracelet. These are super easy to make just basically adding a few jump rings to the end of one of my curved bracelet beads.  You can use either leather or chain with a lobster claw on each end, then just wrap the cord or chain around your wrist.  The fun part is once you have made the leather cord or chain with lobster claw ends you can mix and match them with my pottery beads and have endless combinations, especially if you layer the cord and chain.
Bead Trends February 2013


Here is a Rodeo cuff, a Elli Bead and a Carmine Bead


The tutorial is in the magazine
 
This is one of the photos I submitted to the magazine.


Here is a sample of the rhinestone chain and leather being layered with the rodeo bead. I wear this one all the time and always get lots of smiles and compliments on the bracelet.

This is one of my Carmine beads with mixed metal accents, I put a hole in the bead before firing and then I add the accent beads with tiny micro stainless steel screws and secure them with a tiny micro nut.

This is my steampunk cuff that was also in the February 2031 Bead Trends Magazine
Bead Trends also accepted this steampunk design I made for the February 2013 issue.  This fun steampunk cuff was made out of a pair of my kids recycled blue jeans, you can either buckle the bracelet on or zip it on, as I used the existing buttons and added the zipper to it as an accent.  The bead is one of my lavish steampunk beads and I added 2 layers of gears.  The chain is a piece of recycled ball chain. I just got the cuff back from Bead Trends and I am looking forward to wearing it soon with jeans.  The following images are ones that I took and submitted to the magazine, I thought you might find it interesting to see what I took vs how the magazine photographed the piece.


This image shows the layers of gears well and you can see how I linked the ball chain into the gears.

I have had my beads published before but this was the first time I had sent in the designs.  Lucky me as I flipped thru the magazine I came across this great piece by Molly Alexander she made this great necklace and the little blue bird house bead is one that I made.  Thanks Molly for giving me credit.  Molly has been published many times, she is a talented artist.  Molly has a great blog if you want to visit her there.

Design by Molly Alexander, the bird house bead is one of mine.

 Another great design was featured in the February 2013 Bead and Button by Beth Moser, I love what Beth does with the tiny beads and beautiful designs.  I just do not do well with such tiny beads, but I admire people that do.  The rings are available in my shop if you want to pick up February's Bead & Button magazine and gives these lovely rings a try.
These beautiful rings are the work of Beth Moser as see in Bead and Button Feb. 2013